You want safe, smooth cuts in your meat processing business, but you worry about blade slips or misalignment. You need a clear method to install the blade correctly.
Installing a meat band saw blade requires careful steps: power off, inspect, position, tension, and test. This approach keeps operators safe, extends blade life, and prevents cutting errors.
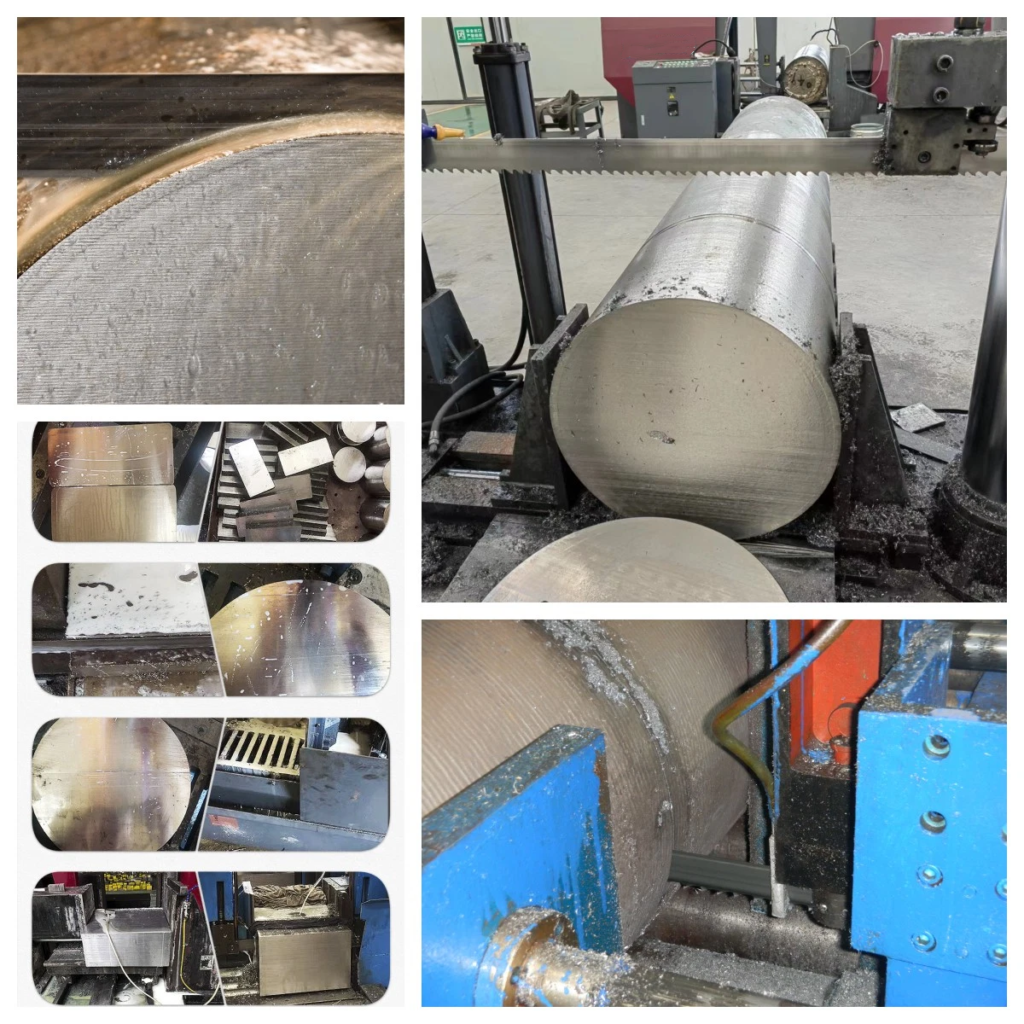
Installing Meat Band Saw Blade
Sometimes I see buyers neglect the small details. That can lead to accidents or wasted blades. Let me walk you through the key steps so your next installation goes smoothly.
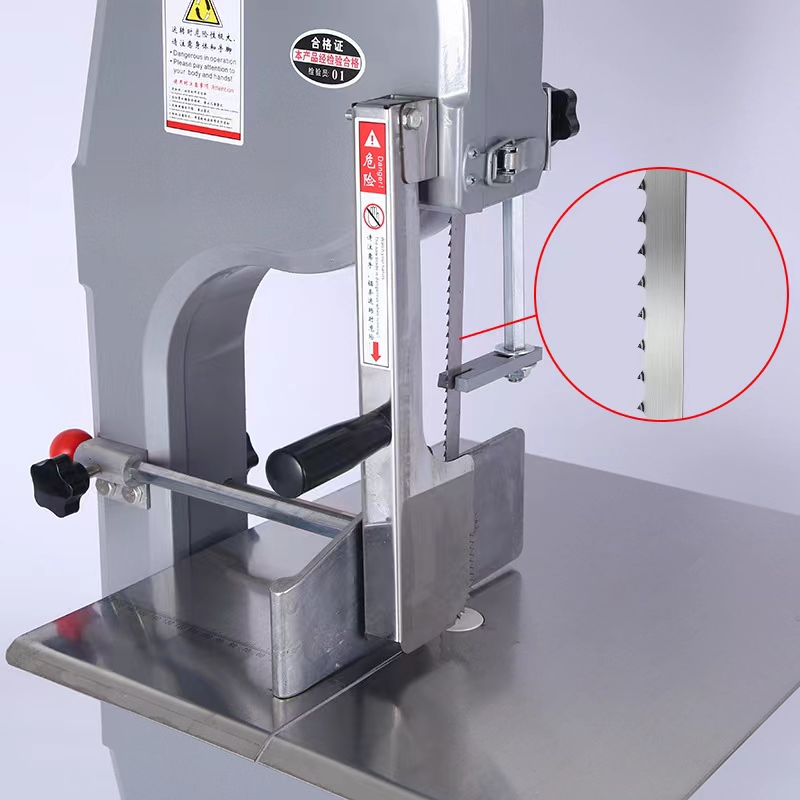
How do I position the blade on the saw wheels?
You notice the blade drifting when you try to place it on the wheels. Or you see that the teeth do not match the right direction. This might feel confusing.
To position the blade, place it on the upper and lower wheels with the teeth pointing forward. Center the blade on both wheels so it sits flat and does not twist.

Blade on Wheels
Dive deeper on correct blade positioning
I learned that proper blade positioning1 is more than just draping it around the wheels. The entire performance depends on how well you align each section of the blade with the wheel surfaces. If the blade sits crooked, you risk poor cuts or even blade damage.
- Power Off and Inspect
I always stress safety first. Turn off the machine and confirm the wheels have stopped. Look at your band saw’s wheel surfaces2. Wipe away any debris. Check if the wheels have leftover particles from previous cuts. Small meat scraps or fat deposits can cause wobble. A quick clean reduces that risk. Inspect the blade, too. Look for chipped teeth or bent areas. If the blade is compromised, do not try to install it. A damaged blade can break under tension.
- Understanding the Tooth Direction
Meat band saw blades3 have teeth designed for a forward-cutting path. You want the teeth to face the direction of the cut. Typically, that means the teeth face down on the front side of the saw. If you mount it in reverse, you will notice a rough or no cut. You might also strain the motor. So, I usually hold the blade in a loop, examine the set of teeth, and ensure the pointed edges face down toward the saw table. This check takes just a few seconds but saves a lot of hassle.
- Center the Blade
Place the blade carefully on the upper wheel first. Let it rest in the wheel’s groove. Then place it on the lower wheel. Adjust so the blade sits in the center of both wheels. Some machines have a slight crown on the wheels. The blade should ride near the middle. If you see the blade edging toward the back or front, gently shift it. The goal is to have a stable, straight path before you apply tension.
- Check Clearance and Guides
Before tensioning, check that the blade is free of obstructions. Look at the blade guides, which are often small blocks or bearings that hold the blade’s position during cutting. Make sure these guides are not forcing the blade to tilt. Each saw brand might have a different guide mechanism. Adjust them according to the manual’s recommendations. The blade should pass freely without scraping the side or top. This step is easier if you can rotate the wheels by hand. That helps you see if the blade might rub at any point.
- Gently Tension
Once the blade is in place, you can add tension. Do not overtighten at first—just enough tension to keep the blade from slipping off the wheels. Then, rotate the wheels a few times by hand. Make sure the blade runs smoothly. If it wobbles, loosen tension and re-center the blade. This might take some trial and error. I prefer a step-by-step approach. Tighten a bit, spin the wheel, check alignment, and tighten again. You will find a sweet spot where the blade runs straight.
- Final Checks
Now, the blade is centered and has some tension. But you are not done yet. Observe the teeth at the front and see if they appear level with the saw table. Are they hitting any part of the machine? Adjust as needed. This is also a good time to confirm your blade is the correct length for your saw. If it is too long, you might not achieve proper tension. The tension might be too high if it is too short, risking breakage. A correct-size blade fits comfortably on the wheels without extreme adjustments.
After you confirm these steps, you can move to final tensioning and testing4 . The biggest mistake I used to make was hurrying the blade-centering process. Taking an extra minute or two to perfect alignment can extend blade life. It also ensures cleaner cuts and helps avoid sudden blade slips during operation. Buyers who follow these steps usually see fewer maintenance problems. They also reduce the chance of downtime in a busy butchery or meat processing shop.
How do I tension and test the blade after installation?
You might fear over-tightening the blade and causing it to snap. Or you might worry about leaving it too loose so it slips. This can ruin your expensive blade.
After installation, tension the blade based on the manufacturer’s guide. Then rotate the wheels by hand. If the blade tracks smoothly, start the machine at low speed to test.
Blade Tension Adjustment
Dive deeper on blade tension and final testing
Once the blade is in position, tension becomes the next big step. I have learned that tension is critical for performance and safety. A blade that is too tight can strain the saw’s bearings or cause cracks in the blade. A loose blade can drift, which leads to rough cuts or an unexpected slip. So let’s break this down.
1. Using the Machine’s Tension Mechanism
Meat band saws usually have a tension knob or lever at the top wheel assembly. Some models also have a gauge showing recommended tension levels. Start by turning the knob until you feel resistance. Then reference any tension indicator if present. Some saws require a specific blade width to tension range. For example, a 5/8-inch blade might need a certain tension setting, while a 3/4-inch blade needs a different setting. If your saw lacks a gauge, you can do the “deflection test.” Press the blade at its midpoint with moderate force. It should deflect slightly, but not too much. That is usually enough tension for meat cutting tasks.
2. Checking for Twisting or Bending
Rotate the wheels by hand. See if the blade remains centered and does not twist from front to back. If it drifts forward, loosen tension slightly and adjust the tracking knob (if your machine has one). Some band saws let you tilt the upper wheel to keep the blade riding in the correct position. This step can require some fine-tuning. But it ensures the blade edges do not rub on the wheels or the guard.
3. Inspecting the Guides Again
After tensioning, revisit the blade guides. They may need readjustment now that the blade is fully tightened. Guides or bearings are meant to hold the blade’s sides without squeezing it. Typically, you leave a small clearance so the blade can move freely. For the thrust bearing behind the blade, set it just shy of contact. You only want it to engage when you push the blade during cutting. This arrangement prevents friction when the blade is idle.
4. Reinstall Guards and Close Doors
Place the protective covers or doors back on. Secure them firmly. Many saws have a safety switch preventing operation if the doors are open. This is crucial for user safety. I have seen accidents happen when operators rushed and forgot to lock the guards. Do not skip this step.
5. Power On and Test
Connect the power and do a brief test run without material. Turn on the saw at a low speed if your saw has variable speed settings. Watch the blade movement. Listen for any squeaks or rattling. If all seems smooth, let it run for a few seconds to confirm stability. If you notice vibrations or the blade drifting, turn off the saw and readjust. Once the blade runs smoothly in idle, you can proceed to a test cut.
6. Test Cut in Meat
Finally, place a small piece of meat or bone to test. Use gentle feed pressure. The blade should cut straight, without wandering. Keep your hands clear, use a pusher if needed, and follow all safety protocols. If the cut is consistent and the blade does not slip, you have done everything right. If you see the blade struggling or hear unusual noise, turn off and recheck alignment. It often only needs a small tweak.
This final check confirms that your installation is sound. Proper tension leads to fewer blade breaks and smoother cuts. That means happier customers, reduced waste, and a more efficient operation. After all, buyers want to maximize each blade’s lifespan and keep their staff safe. Fine-tuning tension and verifying performance is the best way to achieve that.
Conclusion
Installing a meat band saw blade requires careful placement, proper tension, and final testing. Follow each step, and you will enjoy safer cuts and extended blade life.
-
Understanding proper blade positioning can significantly improve cutting accuracy and extend blade life, making it essential for optimal performance. ↩
-
Ensuring the cleanliness and integrity of band saw’s wheel surfaces is crucial for safe and efficient operation. This link provides expert advice on maintenance. ↩
-
Proper installation of Meat band saw blades ensures optimal cutting performance and prolongs the blade’s life. This resource offers detailed guidance. ↩
-
Proper final tensioning and testing can significantly extend blade life, ensure cleaner cuts, and prevent operational downtime. ↩