Are your new band saw blades wearing out too quickly? This costs you money in replacements and downtime. A proper break-in process can easily triple the life of your blades.
To break in a new band saw blade, you must run it at 50% of the normal feed rate and cutting speed. Continue this until you have cut a surface area of 300 to 1000 cm². Then, you can gradually increase the settings to normal.

It sounds simple, but I've seen too many good blades get ruined on their very first day in the shop. The difference between a blade that lasts three weeks and one that lasts three days often comes down to the first hour of use. Let's walk through the exact steps to make sure that never happens to you. This is a crucial part of getting the most value out of your purchase.
Why is breaking in a new blade so important?
You just invested in a brand-new blade. Using it at full power right away feels efficient, but it will cause the blade to fail fast. Understanding why break-in is crucial saves you money.
Breaking in a new blade is vital because it gently hones the microscopic burrs on the fresh teeth. This simple step prevents them from chipping or stripping. It can extend the blade's working life by 30%, and in my experience, often much more.

When I talk to factory managers, I always explain that a new blade is too sharp. Think about it. The manufacturing process creates an extremely fine, sharp cutting edge on every tooth. On a microscopic level, these edges are very thin and brittle. They have tiny, unsupported metal fragments called burrs. If you apply full cutting pressure immediately, these brittle points will catch on the material and snap off. This is called tooth chipping. Once a small chip forms, it creates a weak spot, and the entire tooth can fail soon after.
I have seen this happen countless times. A customer calls me, frustrated that a high-quality bimetal blade they just bought is already cutting crooked. In almost every case, they skipped the break-in. A blade that should have lasted them a week was destroyed in two days. A proper break-in process isn't about dulling the blade. It's about strengthening it by creating a tiny, stable radius on the cutting edge. This makes the tooth tough enough to handle the stress of full-speed production.
| Feature | Non-Broken-In Blade | Properly Broken-In Blade |
|---|---|---|
| Tooth Edge | Extremely sharp, brittle, has micro-burrs | Honed, strong, with a micro-radius |
| Initial Use | Full speed and feed | 50% speed and feed |
| Common Failure | Tooth chipping and stripping | Normal, even wear over time |
| Typical Lifespan | 30% or less of its potential | 100% of its potential life |
What are the exact steps for the break-in process?
You know you need to break in the blade. But guessing the right speed and feed can still ruin it. Follow these specific steps for a perfect break-in every time you mount a new blade.
To break in a new blade, set your saw's feed rate and speed to 50% of the normal settings. Maintain this reduced rate until you have cut a total surface area of 300 to 1000 cm² (about 45 to 155 sq in). Then, slowly bring it to full power.

Getting this right is more about process than feel. I guide my B2B clients through this simple, repeatable procedure to protect their investment.
- Set the Machine Parameters. Look up the recommended blade speed and feed rate for the material you are cutting. Now, reduce both settings by half. If your chart says to run at 100 meters per minute, you will start at 50 meters per minute.
- Choose Your Break-In Material. If possible, use a piece of solid, easy-to-cut mild steel for the break-in process. This provides a consistent, uninterrupted cut that is ideal for gently honing the teeth.
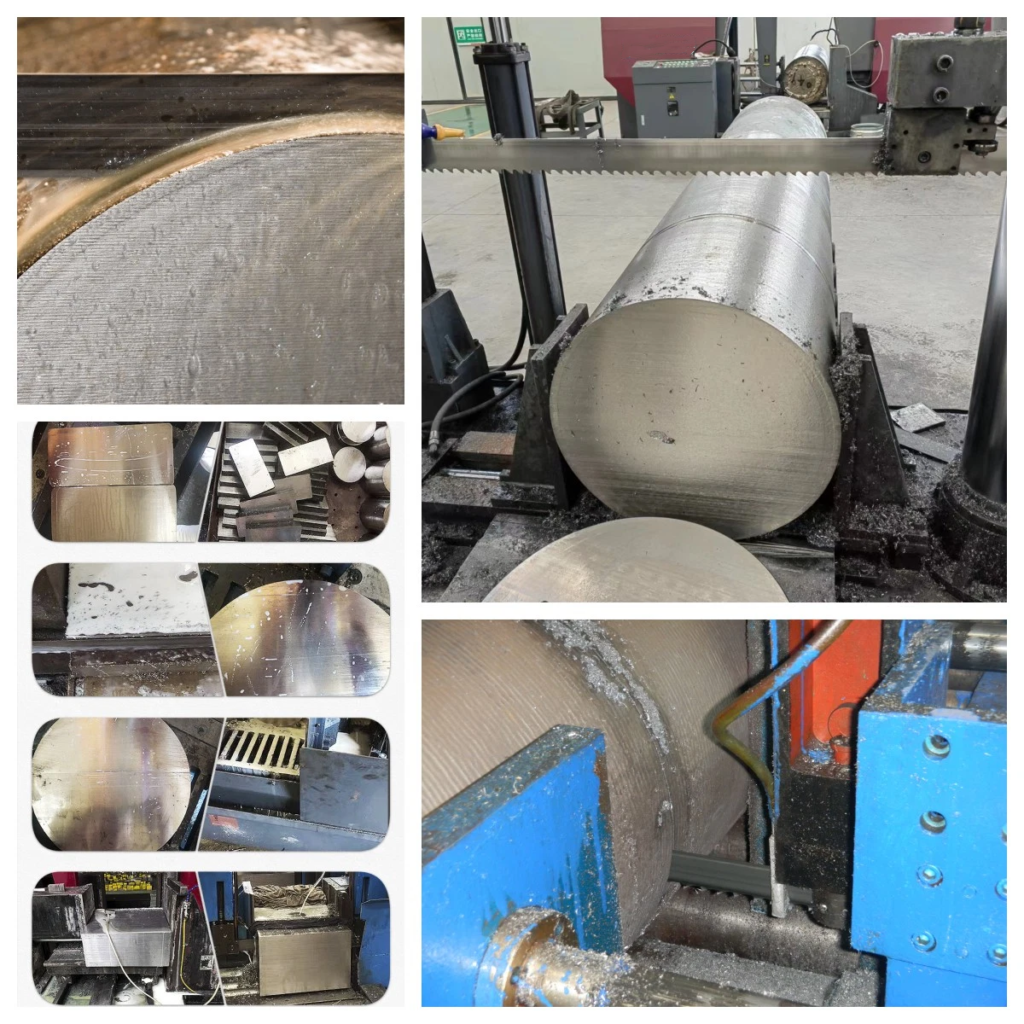
- Make the First Cuts. Begin sawing the material at the reduced 50% settings. Pay close attention. Listen for any chatter or loud vibrations. Watch the chips that are forming. During break-in, the chips should be very thin and fine, almost like powder.
- Calculate the Cutting Area. Your goal is to cut a total surface area between 300 and 1000 cm². This is not about the length of the cut, but the cross-sectional area.
| Material Size (Height x Width) | Cross-Sectional Area | Number of Cuts Needed |
|---|---|---|
| 5 cm x 10 cm | 50 cm² | 6 to 20 cuts |
| 10 cm x 10 cm | 100 cm² | 3 to 10 cuts |
| 20 cm x 20 cm | 400 cm² | 1 to 3 cuts |
- Gradually Increase to Full Power. Once you have cut the required surface area, do not just jump to 100% power. Over the next two or three cuts, slowly increase the feed rate and speed. For example, go to 75% for one cut, then 90% for the next, and finally to 100%. This completes the process.
How does breaking in prevent common blade damage?
You've seen blades fail before their time. Chipped teeth and curled edges are frustrating problems that halt production. The break-in process is designed specifically to prevent these exact types of damage.
Breaking in works by creating a micro-radius on each tooth edge. This controlled, gentle wear removes brittle factory burrs. The resulting stronger, honed edge resists cutting shock, preventing common failures like tooth chipping and tooth curling.

Let's look at the two main culprits of early blade failure and how breaking in stops them. First is tooth chipping. A brand-new tooth tip is like a tiny, sharp needle. When this fragile point slams into hard metal at full force, it can't handle the impact. The tip fractures, creating a small chip. This chip compromises the entire tooth's structure, leading to a bigger break and a useless blade. The break-in process grinds away that fragile point and replaces it with a slightly rounded, much stronger edge that can absorb the impact.
Second is tooth curling, or "roll-over." This happens when the cutting pressure is too high for the thin, unhoned tooth edge. The edge literally bends or rolls over, making it unable to cut effectively. It's like pushing the tip of a sewing needle sideways—it bends easily. By running the blade at a reduced feed rate, you allow the tooth to gently wear into a stable shape. The pressure is low enough that it hones the edge instead of deforming it. I once had a client who was cutting expensive alloy steel. They ruined three new blades in one shift from tooth curling because their operators were in a hurry. After we implemented a strict break-in policy, their blade life doubled.
Does the break-in process change for different materials?
You cut a variety of materials in your shop. A one-size-fits-all break-in might not be ideal for tough alloys or hollow tubes. Adjusting your technique for specific material shapes and types is key to success.
Yes, the break-in process needs small adjustments. For very hard materials, use a lower starting speed and feed. For interrupted cuts like tubes and structural profiles, it is absolutely critical to use a reduced feed rate to avoid snagging and chipping the new teeth.

The basic principle of 50% power is a great starting point, but smart operators make small changes based on the job. In my experience, this is where you can really maximize the blade's potential.
Hard-to-Cut Materials: When you are breaking in a blade on stainless steel, Inconel, or other tough alloys, you have to be more careful. These materials generate a lot of heat and can work-harden if the parameters are wrong. I recommend starting with the blade speed at 50%, but reducing the feed rate even more—down to about 30-40% of the normal rate. The goal is a very gentle action that hones the teeth without creating excessive heat or pressure.
Interrupted Cuts: This is the most dangerous situation for a new blade. When cutting tubes, I-beams, or bundles of material, the blade teeth are constantly entering and exiting the cut. Each entry is a small impact. A new, brittle tooth can easily chip on the sharp corner of a pipe wall. For these materials, the feed rate is the most important factor. I tell my clients to reduce the feed rate to 50% or even less. The blade speed can be closer to normal (maybe 70-80%), but the blade must enter the material very gently to avoid shock. Once the blade is fully engaged in the cut, you can slightly increase the feed.
| Material Type | Recommended Break-In Adjustment | Key Consideration |
|---|---|---|
| Solid Mild Steel | Standard: 50% speed, 50% feed | Easiest and most stable for break-in. |
| Hard Alloys | 50% speed, 30-40% feed | Avoid heat buildup and work-hardening. |
| Tubes & Profiles | 70% speed, 30-50% feed | Prevent impact shock on tooth entry. |
Conclusion
Breaking in your new band saw blades is not an optional step. It is a simple investment of time that directly increases blade life, reduces costs, and improves your cutting operation.