Your new blades have arrived. But a bad blade can stop your whole production line. You need to be sure they are good before you start cutting.
To properly inspect bimetal band saw blades, you must perform a visual check for defects, measure the dimensions to ensure they match specs, test the tooth hardness, and conduct a practical cutting test. This process ensures quality and prevents expensive production issues.

Getting the right blades is just the first step. Making sure the blades you received are the right ones is crucial. It protects your investment and your machines. I've learned this the hard way over many years in this business. Let's break down the inspection process step-by-step, so you don't have to learn those same hard lessons.
What Should You Look for in a Visual and Dimensional Check?
A blade might look fine from a distance. But small flaws can cause big problems later. You need a closer look to spot issues before they hit your production floor.
First, visually inspect the blade body and teeth for any cracks, scratches, or color inconsistencies. Then, use calipers to meticulously measure the blade's width, thickness, and tooth pitch. These must match your order specifications exactly to ensure proper performance and safety.

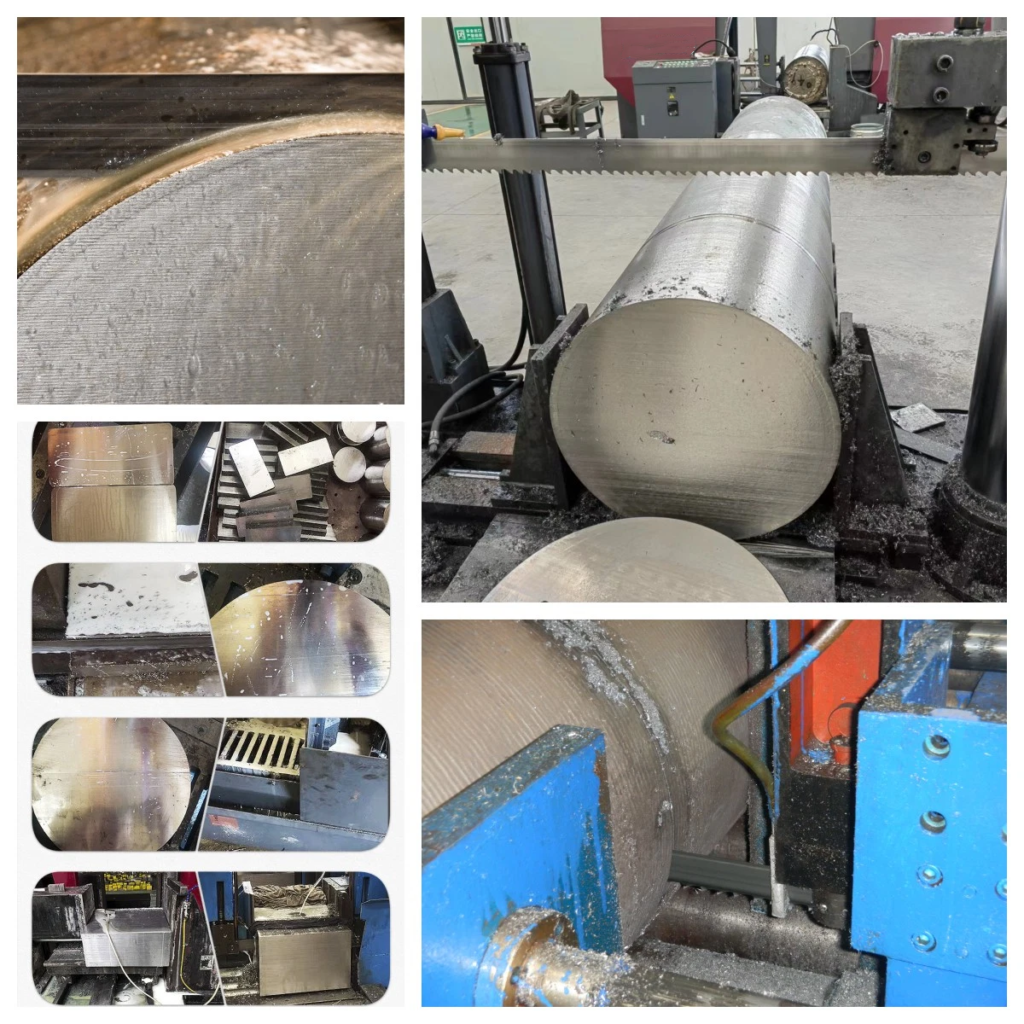
This is the first thing I do with any new shipment. I put on my safety gloves and carefully uncoil a section of the blade. The first test is simply by feel. I run my gloved hand along the back of the blade. It should feel perfectly smooth and flat. Any bumps or waves are an immediate red flag. Then, I look for the weld joint. A good weld is ground smooth and is almost invisible. If you can feel a significant bump or see discoloration around the weld, it could be a weak point that will fail under tension.
Next, I get out my magnifying glass to examine the teeth. Are the tooth tips sharp and uniform? Are there any chipped, broken, or missing teeth? A single damaged tooth can ruin the cut finish and shorten the blade's life. I also check the "set" of the teeth, which is the slight side-to-side bend that creates clearance for the blade. The set should be even and consistent.
For dimensions, you must be precise. I use a digital caliper for the most accurate readings.
| Measurement | Tool | What to Check |
|---|---|---|
| Width | Caliper | Should be consistent along the blade and match your order. |
| Thickness | Caliper | Must be uniform. Any variation can cause tracking problems. |
| Tooth Pitch | TPI Gauge / Ruler | Check the number of teeth per inch (TPI). It must be correct. |
| Weld | Visual Check | Look for a smooth, flush finish with no bumps or cracks. |
I once had a batch of blades where the thickness was off by just a tiny fraction. They looked perfect, but they wouldn't track correctly on our saws. That small error cost us a day of production trying to figure out the problem. Now, we measure everything.
How Do You Verify the Blade's Core Performance?
A blade can look perfect but fail under pressure. Looks are not everything. You must test its real strength and cutting ability to know its true quality.
You verify performance by testing two key things. First, use a hardness tester on the tooth tips to ensure they meet the required Rockwell hardness (HRC) standard. Second, run a controlled cutting test on scrap material to evaluate the cut quality and straightness.

After a blade passes the visual and dimensional checks, it's time to test its material properties. The hardness of the tooth tips is the most critical factor for blade life. The teeth are made of very hard high-speed steel (HSS), while the backing material is a flexible spring steel. If the tooth hardness is not right, the blade is useless.
I use a portable Rockwell hardness tester to check this. I take readings from a few different teeth along the blade. For a standard M42 bimetal blade, I expect a reading between 67 and 69 HRC. If it's too soft, the teeth will dull almost immediately. If it's too hard, they can become brittle and chip away. A good supplier will always provide a spec sheet with the target hardness range.
Then comes the ultimate proof: the cutting test. I mount the new blade on one of our saws, making sure the machine itself is perfectly aligned. I always follow the recommended break-in procedure. Many people skip this, but it's essential. It involves making a few slow cuts at reduced feed pressure to gently hone the sharpest edge of the new teeth. This small step can double a blade's life. I then make several cuts on scrap material that is similar to what we cut in production. I look at the cut surface. Is it smooth? I check the cut itself. Is it perfectly straight, or did the blade wander? Finally, I look at the chips. Well-formed, curled chips tell me the blade is cutting efficiently. Powdery dust means the blade is just rubbing, not cutting.
Why is Checking the Packaging and Sampling So Important?
The inspection is almost done. It is tempting to skip the final checks on boxes and labels. But this last step protects you from future mix-ups and logistical nightmares.
Checking the packaging ensures the blades were not damaged during shipping. Verifying labels confirms you received the correct size, type, and quantity. A sampling plan lets you efficiently check a large shipment without inspecting every single blade, saving time while maintaining quality control.

This final step is about logistics and risk management. I start with the box itself. Is it crushed, torn, or water-damaged? A damaged box often means a damaged product. A quality supplier will package their blades securely, usually coiled in a sturdy box with rust-inhibiting paper. This shows they care about their product arriving safely.
Next, I check the label on the box against my purchase order. This is non-negotiable. The label must be clear and accurate. I verify the blade type (e.g., M42, M51), the exact dimensions (width, thickness, length), and the tooth pitch (TPI). A simple mix-up here can be disastrous. Imagine trying to cut stainless steel with a blade designed for wood, all because someone grabbed the wrong box. It seems simple, but I've seen it happen. Checking the label prevents these costly errors.
For large orders of hundreds of blades, you can't inspect every single one. This is where a sampling plan comes in. We use a standard known as AQL, or Acceptable Quality Level. Based on the total lot size, we determine a smaller sample size to inspect thoroughly. For example, in a shipment of 500 blades, our plan might tell us to inspect 20. If we find more than one major defect in that sample, we can reject the entire shipment. This statistical method gives us high confidence in the quality of the whole batch without spending days on inspection. It is a smart and efficient way to manage quality control in a busy factory.
Conclusion
A thorough inspection process is not a cost. It's an investment in quality, efficiency, and the protection of your production line. Don't let a bad blade stop your work.